

Ebike Controller Manual⁚ Troubleshooting and Maintenance
Having basic troubleshooting skills for your ebike controller is essential for any biker. An ebike controller is a vital component; it controls all other electric units.
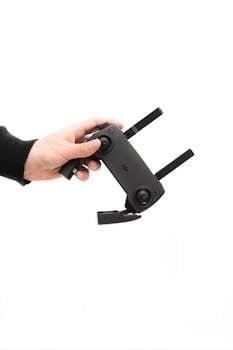
Understanding the Ebike Controller
The ebike controller is often referred to as the brain of your electric bicycle. It’s a small, yet crucial component that governs the motor’s operation and manages various electrical functions. Think of it as the central processing unit (CPU) of your ebike, coordinating the battery, motor, throttle, and other components to provide a seamless riding experience. The controller receives input from the throttle or pedal assist system, interprets this information, and then regulates the amount of power delivered from the battery to the motor. This process dictates the speed and acceleration of your ebike. A well-functioning controller ensures smooth acceleration, efficient energy use, and overall reliable performance. Understanding its role and how it interacts with other parts of your ebike is the first step in effective troubleshooting and maintenance. Keeping it healthy is key to ensure longevity and smooth rides.

Common Ebike Controller Issues
Ebike controller problems can be frustrating, but many issues can be resolved without professional help. Common issues include power loss and erratic speed, which can affect the ride.
No Power or Intermittent Power Loss
One of the most common issues ebike owners face is the sudden loss of power or intermittent power delivery. This can be caused by several factors, ranging from simple connection problems to more complex controller malfunctions. Begin by checking the battery voltage to ensure it meets the minimum required level, typically around 40V for a 44V battery or 60V for a 66V battery. A fully charged battery is crucial for proper operation. Next, inspect all wiring connections between the battery, controller, and motor. Look for any loose, disconnected, or damaged wires or connectors. Corrosion can also impede the flow of electricity, so clean any corroded connections with a wire brush or electrical contact cleaner; Pay close attention to the power switch, ensuring it is functioning correctly and not the source of the interruption. If the problem persists, consider the possibility of a blown fuse, which is designed to protect the controller from overcurrent. Replace any blown fuses with the correct amperage rating. Intermittent power loss can also be triggered by heat, cold, or moisture, so avoid storing your e-bike in extreme conditions and ensure the controller is dry after rides in wet weather. Addressing these potential issues systematically will help you pinpoint the cause of the power problem and restore your ebike to its optimal performance.
Erratic Speed or Motor Stuttering
Erratic speed or motor stuttering is another frustrating issue that ebike riders may encounter. This behavior often manifests as inconsistent acceleration, sudden bursts of speed, or a jerky, uneven motor response. One primary cause of this problem can be a faulty throttle. The throttle controls the amount of power delivered to the motor, and if it’s malfunctioning, it can send incorrect signals to the controller, resulting in erratic speed. Test the throttle by carefully observing its response as you gradually increase and decrease the throttle input. If the motor’s response is inconsistent or unpredictable, the throttle may need replacement. Another potential culprit is the motor itself. Issues within the motor, such as worn-out hall sensors, can cause the motor to stutter or operate at irregular speeds. Hall sensors are responsible for detecting the position of the motor’s rotor, and if they fail, the motor’s performance will suffer. Inspect the motor wires for any signs of damage or loose connections. Loose connections can disrupt the flow of power to the motor, causing it to stutter. Riding noise, slow speed, or the inability to start without manual motor assistance can also indicate motor-related problems. In such cases, consulting a professional ebike technician is recommended to diagnose and resolve the issue effectively. Additionally, ensure that the controller is properly matched to the ebike’s design and specifications, as using an incompatible controller can lead to performance issues.
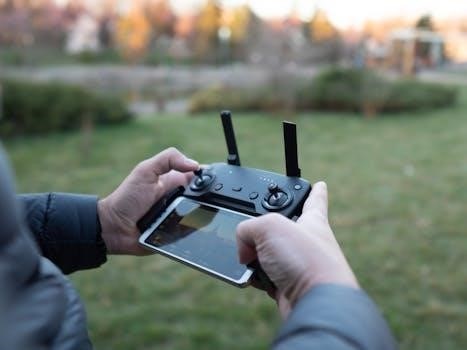
Ebike Controller Testing and Diagnosis
Troubleshooting your e-bike can seem tricky, but it doesnt have to be. Follow this guide to tackle common issues. The controller is your e-bikes brain, so keeping it healthy is key.
Checking Wiring Connections and Fuses
One of the primary steps in diagnosing ebike controller issues involves meticulously checking all wiring connections. Begin by visually inspecting the controller for any wires that are disconnected, loose, or improperly connected. A disconnected wire can easily disrupt the flow of power and signals, leading to a malfunctioning controller. Ensure that each wire is securely plugged into its corresponding outlet, matching wire colors with outlet colors for accuracy. Gently pull and push on individual wires and connectors to confirm they are firmly in place and not damaged. Burned or melted wires, electrical components, or wire connectors are clear indicators of a problem. Look closely for any signs of corrosion or water damage, especially if you frequently ride in wet conditions. Furthermore, it’s crucial to check the fuses associated with the ebike’s electrical system. A blown fuse is a common culprit for controller failure, and replacing it can often restore functionality. Refer to your ebike’s user manual to locate the fuse box and identify the correct fuse for the controller. Use a multimeter to test the continuity of the fuse; a reading of zero indicates a blown fuse. Replace any blown fuses with ones of the exact same amperage rating to prevent further damage. Remember to disconnect the battery before inspecting any electrical components to avoid accidental shocks or short circuits; This thorough inspection of wiring connections and fuses can help pinpoint the source of many ebike controller problems.
Using a Multimeter to Verify Functionality
Employing a multimeter is a crucial step in accurately diagnosing ebike controller issues and verifying its functionality. A multimeter allows you to measure voltage, current, and resistance, providing valuable insights into the controller’s performance. Before testing, consult your ebike’s wiring diagram to identify the specific pins and wires responsible for power input, motor output, throttle signal, and other essential functions. Begin by checking the voltage at the controller’s power input terminals. Ensure that the voltage matches the specified voltage of your ebike’s battery; it should not be significantly lower. Next, test the output voltage to the motor while the throttle is engaged. The voltage should increase proportionally with the throttle input, indicating that the controller is properly regulating power to the motor. A lack of voltage or an inconsistent reading suggests a potential problem within the controller. Furthermore, you can use the multimeter to test the throttle signal wire. With the throttle at rest, the voltage should be around 1 volt, increasing to approximately 4-5 volts when fully engaged. Any deviation from these values may indicate a faulty throttle or an issue with the controller’s ability to interpret the throttle signal. When testing, always ensure that the multimeter is set to the appropriate range and that the probes are correctly connected to the terminals. Exercise caution to avoid short circuits or damage to the controller. If you are unfamiliar with using a multimeter, it is advisable to seek assistance from a qualified technician to prevent accidental damage or injury.
Ebike Controller Maintenance and Longevity
Maintaining your e-bikes functionality is crucial for a seamless riding experience. The controller is your e-bikes brain, so keeping it healthy is key to extend its lifespan.
Protecting the Controller from the Elements
Heat, cold, and moisture are enemies of your ebike controller. These environmental factors can significantly reduce its lifespan and performance. To ensure longevity, avoid storing your e-bike in extreme temperatures. Excessive heat can cause the internal components to overheat and potentially fail, while extreme cold can make the controller brittle and prone to cracking. Moisture is particularly damaging, as it can lead to corrosion and short circuits. Always dry the controller after rides in the rain or wet conditions. Consider using a protective cover or shield to further safeguard the controller from the elements. This is especially important if you frequently ride in inclement weather. Regularly inspect the controller housing for any signs of damage or wear, and address any issues promptly to prevent further deterioration. By taking these simple precautions, you can significantly extend the lifespan of your ebike controller and ensure reliable performance for years to come. Remember, a little preventative care goes a long way in protecting this vital component of your e-bike system.
Regular Inspection and Connection Care
Maintaining the electrical connections of your ebike controller is crucial for optimal performance and preventing unexpected failures. Regularly inspect all wiring connections to ensure they are secure and free from corrosion. Loose connections can cause intermittent power loss, erratic motor behavior, or even complete system failure. Gently tug on each wire to check for looseness, and tighten any connections that feel wobbly. Pay close attention to the connectors themselves, looking for signs of corrosion or damage. If you spot any corrosion, clean the connectors with a specialized electrical contact cleaner. Disconnect the connectors before cleaning, and allow them to dry completely before reconnecting. When reconnecting, ensure the connectors are fully seated and locked in place. In addition to checking the connections, inspect the wires themselves for any signs of wear, fraying, or damage. Replace any damaged wires immediately to prevent shorts or other electrical problems. Consider applying dielectric grease to the connectors to protect them from moisture and corrosion. This will help to maintain a reliable electrical connection and extend the lifespan of your ebike controller. Regular inspection and connection care are essential for ensuring the safe and reliable operation of your e-bike.