

The Hologram Microcosm is a versatile effects processor designed for sound designers and musicians, offering a unique blend of looper, granular sampling, and delay effects in one unit.
1.1 Overview of the Hologram Microcosm
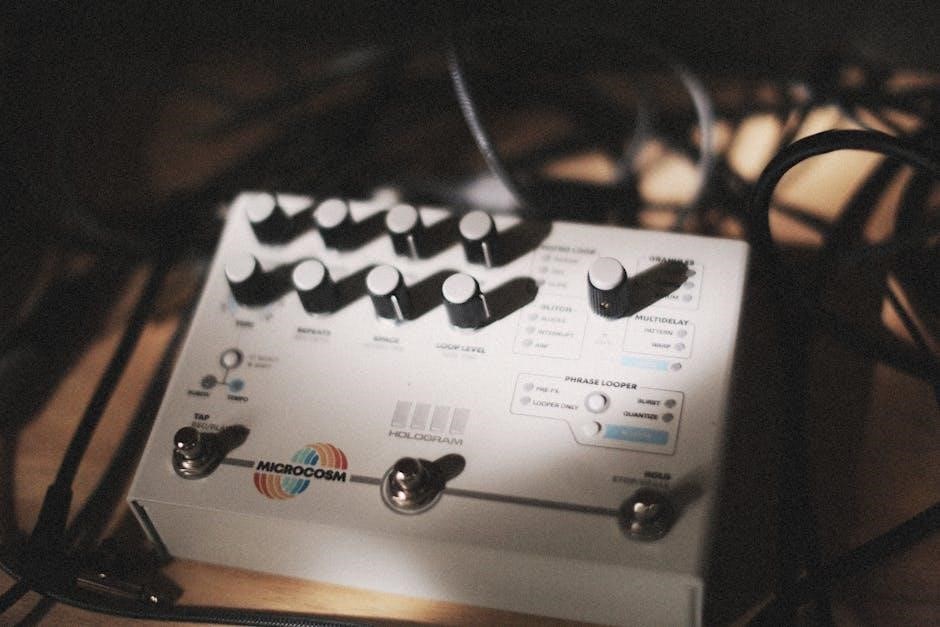
The Hologram Microcosm is a cutting-edge, multi-functional effects processor designed to revolutionize sound design and music production. It combines a looper, granular sampler, and delay effects into a single, intuitive unit. Perfect for musicians and sound designers, it offers endless possibilities for creating ambient soundscapes, glitchy textures, and experimental sounds. With its robust feature set, the Microcosm empowers users to push the boundaries of audio manipulation. Its compact design and user-friendly interface make it accessible to both beginners and seasoned professionals. Whether you’re crafting intricate layers or exploring new sonic territories, the Microcosm serves as a versatile tool for artistic expression and technical precision.
1.2 Key Features of the Hologram Microcosm
- Advanced Effects Processing: The Microcosm offers a powerful combination of granular sampling, delay effects, and a built-in looper, allowing for dynamic sound manipulation.
- MIDI Control: Seamlessly integrate the Microcosm into your setup with MIDI clock sync and external control capabilities for precise performance and synchronization.
- Intuitive Interface: Navigating the device is made easy with a user-friendly layout, featuring responsive controls and clear visual feedback for real-time adjustments.
- Presets and Customization: Save and load custom presets to quickly access your favorite settings, making it ideal for both live performances and studio sessions.
- Interactive Manual: An interactive PDF manual is available, providing detailed guidance and enhancing the learning experience for users of all skill levels.
These features make the Hologram Microcosm a versatile and essential tool for sound designers and musicians seeking to explore new sonic possibilities.
1.3 Target Audience for the Hologram Microcosm Manual

The Hologram Microcosm manual is designed for musicians, sound designers, and audio enthusiasts seeking to explore the device’s creative possibilities; It caters to both professionals and hobbyists, providing detailed guidance for mastering its advanced features. Beginners will find clear instructions for setup and basic operations, while experienced users can delve into troubleshooting and optimizing performance. The manual is also a valuable resource for educators teaching sound design and electronic music production. Whether you’re creating ambient soundscapes, experimenting with glitch effects, or integrating the Microcosm into a live setup, this manual ensures you unlock its full potential and enhance your sonic creativity.

Setting Up the Hologram Microcosm
Begin by unboxing and inspecting the unit, then proceed to power it up using the provided adapter. Connect it to your setup, ensuring all cables are securely attached.
2.1 Unboxing and Initial Inspection
When you unbox the Hologram Microcosm, carefully inspect the unit for any visible damage or defects. Ensure all components, including the power adapter and manual, are included. Gently remove the protective covering and handle the device with care to avoid scratches. Check the inputs and outputs for cleanliness and proper connection points. Familiarize yourself with the control layout and features before powering it on. This step ensures a smooth setup process and helps identify any potential issues early. Once satisfied with the inspection, proceed to the next step of powering up the device.
2.2 Powering the Hologram Microcosm
To power the Hologram Microcosm, locate the DC power input on the rear panel and insert the provided power adapter. Ensure the adapter is rated for the correct voltage to avoid damage. Plug the adapter into a stable power source and switch it on. The unit will boot up automatically, and you may see LED indicators lighting up to confirm power is on. If using a line-level input, adjust the preamp gain as needed to optimize the signal-to-noise ratio. Avoid using incorrect power sources, as this could harm the device. Once powered, the Microcosm is ready for connection to your setup. Always ensure the power source is stable to prevent unexpected shutdowns or interference.
2.3 Connecting the Hologram Microcosm to Your Setup
Connect the Hologram Microcosm to your audio setup using the input and output jacks located on the rear panel. For optimal signal quality, use high-quality cables to ensure minimal noise and interference. The unit can be connected to a variety of devices, including guitars, synthesizers, or mixers. If using a line-level input, adjust the preamp gain to achieve the desired signal strength. For MIDI control, connect a MIDI interface or controller to sync with external devices or sequencers. Ensure all connections are secure before powering on to avoid signal loss or damage. Additionally, consider using a stable power source and proper gain staging to maintain a clean and consistent audio signal throughout your setup.

Basic Operations of the Hologram Microcosm
The Hologram Microcosm’s basic operations involve navigating the intuitive interface, adjusting controls for real-time effects, and managing presets to streamline your workflow and enhance creativity.
3.1 Navigating the Interface
Navigating the Hologram Microcosm’s interface is straightforward, with an intuitive layout designed for seamless creativity. The unit features a high-resolution display that clearly shows active presets, modes, and real-time parameter adjustments; Knobs and buttons are strategically placed for easy access, allowing users to tweak effects and settings without confusion. The encoder enables quick menu navigation, while touch-sensitive controls provide additional convenience. Whether you’re scrolling through presets or adjusting granular sampling parameters, the interface ensures a smooth workflow. This design prioritizes efficiency, letting users focus on sound creation and experimentation rather than getting lost in complex menus.
3.2 Understanding the Controls and Knobs
The Hologram Microcosm features a logical control layout, with each knob and button serving specific functions. The main encoder allows for precise parameter adjustments and menu navigation, while the touch-sensitive buttons provide quick access to presets and modes. Assignable knobs let you customize control over key effects like delay time or grain size. Dedicated buttons simplify actions like looper undo/redo and effect bypass. The interface includes visual feedback, such as color-coded LEDs, to indicate active modes or parameter levels. Understanding these controls empowers you to explore the Microcosm’s full potential, ensuring intuitive operation during performances or sound design sessions.
3.3 Saving and Loading Presets
Saving and loading presets on the Hologram Microcosm is straightforward, allowing you to organize and recall your custom settings efficiently. To save a preset, press and hold the “Preset” button until the display flashes, then use the encoder to select an empty slot. Navigate through the preset banks using the arrow buttons, and confirm with a short press of the “Preset” button. For loading, simply select the desired preset using the encoder or arrow buttons and press the “Preset” button to activate it. The Microcosm supports multiple preset banks, enabling easy organization of your sounds. This feature is particularly useful for live performances, where quick access to specific tones is essential. Regularly saving your work ensures that your unique creations are preserved for future use.

Advanced Features of the Hologram Microcosm
The Microcosm offers advanced features like granular sampling, delay effects, and MIDI control, enabling deep sound manipulation and seamless integration with external devices for enhanced creativity.
4.1 Exploring the Looper Function
The Hologram Microcosm’s looper function is a powerful tool for creating and manipulating audio loops. It allows users to record, play back, and layer sounds in real-time, enabling intricate soundscapes and rhythmic textures. The looper is accessed via dedicated controls, making it easy to engage and adjust on the fly. One notable feature is the ability to undo the last recorded take, which can be useful for refining loops without losing previous work. However, some users have noted that the undo function erases all takes after the first, which can be limiting for complex compositions. Despite this, the looper remains a standout feature, offering endless possibilities for experimentation and live performance.
4.2 Using Granular Sampling and Delay Effects
The Hologram Microcosm excels in granular sampling and delay effects, offering a rich palette for sound manipulation. Granular sampling breaks down audio into tiny grains, allowing for unique texturing and time-stretching effects. The delay function provides rhythmic interest and spatial depth, with options for syncopated patterns and feedback loops. Together, these features enable the creation of ambient soundscapes, glitchy textures, and complex layered sounds. Users can experiment with parameter adjustments to achieve everything from subtle echoes to chaotic, otherworldly effects. The Microcosm’s intuitive controls make it easy to dial in the perfect balance of grain and delay, ensuring endless creative possibilities for sound designers and musicians alike.
4.3 MIDI Control and External Clock Sync
The Hologram Microcosm supports MIDI control, allowing seamless integration with external devices and sequencing. Users can control parameters, navigate presets, and sync effects via MIDI, enhancing live performance and studio workflows. External clock sync enables precise tempo alignment with other gear, ensuring rhythmic consistency. The Microcosm can receive MIDI clock signals, making it easy to synchronize loops, delays, and granular effects with drum machines or DAWs. This feature is particularly useful for creating cohesive live sets or studio productions. MIDI control also allows for real-time manipulation of effects, adding dynamic expression to performances. By leveraging MIDI and external sync, users can unlock the full potential of the Microcosm’s advanced features and integrate them into their existing musical setups effortlessly.

Sound Design Techniques with the Hologram Microcosm
The Hologram Microcosm empowers sound designers to craft unique textures through granular sampling, delay effects, and layering, enabling the creation of ambient soundscapes and experimental audio.
5.1 Creating Ambient Soundscapes
Creating ambient soundscapes with the Hologram Microcosm involves layering textures and experimenting with time-based effects. Start by feeding the unit with a clean, sustained sound source, such as a synthesizer or a guitar played with reverb. Use the granular sampling feature to break down the sound into micro-samples, creating ethereal, shifting textures. Adjust the delay effects to introduce depth and space, experimenting with long feedback loops for a sense of expansion. The looper function allows you to build gradual layers, stacking subtle variations to craft immersive environments. Pay attention to the balance between dry and wet signals to maintain clarity while adding complexity. For dynamic control, use MIDI to automate parameter changes, such as shifting sample rates or delay times, to evolve the soundscape over time. This approach transforms simple inputs into rich, otherworldly atmospheres, perfect for ambient music or sound art.
5.2 Generating Glitchy and Experimental Sounds
Generating glitchy and experimental sounds with the Hologram Microcosm involves exploiting its unique features to create unpredictable, fragmented audio textures. Start by using the looper to capture short, percussive snippets, then manipulate them with the undo function to introduce abrupt, stuttering effects. The granular sampling feature is ideal for breaking down sounds into micro-particles, creating glitch-like artifacts when adjusting sample rates or window sizes. Experiment with high feedback levels in the delay section to generate chaotic, self-oscillating patterns. MIDI control can be used to trigger sudden parameter changes, such as reversing samples or skipping loops, for added unpredictability. By pushing the boundaries of these features, you can craft sounds that challenge conventional audio processing, making the Microcosm a powerful tool for experimental music production.
5.3 Layering and Texturing Your Sound
Layering and texturing your sound with the Hologram Microcosm is a powerful way to create depth and complexity in your audio. Start by stacking multiple loops at different speeds or reverse settings to build intricate rhythmic patterns. Use the granular sampling feature to break down sounds into tiny particles, then reassemble them with varying window sizes and densities for unique textures. Experiment with delay effects to add spatiality and width to your sound. For added dimension, layer processed sounds with raw inputs or external sources. MIDI control allows for dynamic manipulation of these layers in real-time, enabling immersive performances. By combining these techniques, you can craft rich, evolving soundscapes that captivate listeners and push the boundaries of creative sound design.

Troubleshooting Common Issues
Troubleshooting the Hologram Microcosm involves addressing common issues like quiet signals, MIDI sync problems, or firmware glitches. Always check connections, ensure proper power supply, and restart the unit. For quiet signal, verify input levels and gain staging. If MIDI sync issues occur, ensure the MIDI channel is correctly set and the clock source is stable. Regularly updating firmware prevents bugs and ensures optimal performance. Refer to the official manual or support resources for detailed solutions and guidelines.

6.1 Fixing Quiet or No Signal Output
If the Hologram Microcosm is producing a quiet or no signal output, start by checking the input and output connections. Ensure all cables are securely plugged in and free from damage. Verify that the input source is active and sending a proper signal. Adjust the gain staging to ensure the input level is optimal—too low, and the signal may be weak; too high, and it could cause distortion. If using the line-level input, confirm the switch is set correctly. Additionally, check the output volume knob to ensure it’s not turned down. If issues persist, restart the unit or consult the manual for firmware updates. Testing with a different signal source or cable can help isolate the problem. Always refer to the official troubleshooting guide for detailed steps.
6.2 Resolving MIDI Sync Problems
MIDI sync issues with the Hologram Microcosm can often be resolved by checking the MIDI settings. Ensure the MIDI clock is enabled and properly configured. Navigate to the Global Settings menu, select MIDI/Tempo, and set “Receive MIDI Clock” to the correct MIDI channel. Verify that all connected devices are synced to the same BPM. If using an external MIDI controller, test the connection with a different MIDI cable or interface. Restart the Microcosm and ensure the firmware is up to date, as outdated versions may cause compatibility issues. Adjust timing settings or internal clock synchronization to align with your setup. If problems persist, consult the official manual or contact Hologram Electronics support for further assistance.
6.3 Updating Firmware for Optimal Performance
Regular firmware updates are essential for maintaining the Hologram Microcosm’s performance and functionality. To update, visit the official Hologram Electronics website and download the latest firmware version. Use a USB drive to transfer the update file to the Microcosm. Power on the device, navigate to the System Settings menu, and select “Update Firmware.” Follow the on-screen instructions to complete the process. Ensure the unit is not disconnected during the update. Once done, restart the Microcosm to apply the changes. Updated firmware often includes bug fixes, new features, and improved compatibility. Always verify the firmware version after installation to confirm success. Regular updates ensure your device operates at its best, providing a seamless and enhanced user experience.
The Hologram Microcosm Community
The Hologram Microcosm community is vibrant and active, with forums, user groups, and artist showcases fostering collaboration and creativity among musicians and sound designers worldwide.
7.1 Online Forums and User Groups
The Hologram Microcosm community thrives in online forums and user groups, where musicians and sound designers share tips, tricks, and creative approaches. These platforms are hubs for troubleshooting, showcasing projects, and discussing new features. Users often collaborate on unique sound designs and exchange presets. Forum discussions frequently cover topics like optimizing granular sampling and mastering the looper function. Additionally, these spaces host live Q&A sessions with experts and feature user-generated content. The community’s diversity fosters innovation, with members from various musical genres and professional backgrounds contributing their insights. Regular updates from Hologram Electronics ensure users stay informed about firmware releases and best practices. This collective knowledge base makes the forums an invaluable resource for both beginners and advanced users.
7.2 Artist Showcase and User-Generated Content
The Hologram Microcosm has inspired a vibrant community of artists who share their creations and techniques online. Platforms like YouTube and dedicated forums are filled with user-generated content, showcasing the device’s versatility. From ambient soundscapes to experimental glitch music, users demonstrate the Microcosm’s capabilities in innovative ways. Many artists post detailed tutorials, highlighting how they achieve specific effects, such as layered textures or rhythmic manipulations. These showcases not only inspire others but also provide practical insights into the device’s features. The community actively engages with this content, fostering collaboration and creativity. By exploring these resources, users can gain inspiration and discover new ways to push the boundaries of sound design with the Hologram Microcosm.
7.3 Staying Updated with Firmware Releases
To ensure optimal performance and access to new features, it’s crucial to stay updated with the latest firmware releases for the Hologram Microcosm. Hologram Electronics regularly releases firmware updates, which often include bug fixes, feature enhancements, and new functionalities. Users can subscribe to the official Hologram Electronics newsletter or follow their social media channels to receive notifications about updates. Additionally, the official Hologram Electronics website provides a dedicated section for firmware downloads and release notes. The community forums also discuss updates, offering insights and tips for installation. Regularly checking for updates ensures you’re making the most of your Microcosm’s capabilities and enjoying the latest improvements.

Resources and Further Learning
Explore the official Hologram Electronics documentation and interactive PDF manual for in-depth guidance. Tutorials, video guides, and user-generated content offer additional insights to master the Microcosm.
8.1 Official Hologram Electronics Documentation
The official Hologram Electronics documentation is your primary resource for mastering the Microcosm. It includes a comprehensive manual, troubleshooting guides, and firmware update instructions. The manual covers everything from basic setup to advanced features, ensuring you get the most out of your device. Key sections include detailed explanations of the looper, granular sampling, and delay effects, as well as step-by-step instructions for MIDI control and signal optimization. Additionally, the documentation provides insights into sound design techniques and community-driven tips for experimental sounds. Regularly updated, it reflects the latest firmware improvements and user feedback. For a seamless experience, the manual is also available as an interactive PDF. This official documentation is essential for both newcomers and experienced users seeking to unlock the Microcosm’s full potential.
8.2 Tutorials and Video Guides
Tutorials and video guides are invaluable resources for mastering the Hologram Microcosm. These visual aids provide step-by-step walkthroughs of the device’s features, from basic setup to advanced sound design techniques. Platforms like YouTube and the official Hologram Electronics website host a variety of tutorials, covering topics such as navigating the interface, using the looper function, and experimenting with granular sampling. Many videos are created by experienced users and artists, offering unique perspectives and creative approaches. Whether you’re a beginner or an advanced user, these guides help you unlock the Microcosm’s full potential. They also often include tips for troubleshooting common issues and optimizing your workflow. Regularly updated content ensures you stay informed about the latest features and firmware enhancements.
8.4 Interactive PDF Manual for the Hologram Microcosm
The interactive PDF manual for the Hologram Microcosm is a comprehensive digital resource designed to enhance your understanding and use of the device. This manual is fully searchable, allowing quick access to specific topics and features. It includes hyperlinks to relevant sections, making navigation seamless. The PDF also features detailed diagrams, screenshots, and step-by-step instructions to guide you through setup, operation, and advanced techniques. Regularly updated to reflect firmware changes, the manual ensures you have the most current information. Whether you’re troubleshooting or exploring new sound design methods, this interactive guide is an essential tool for maximizing your Microcosm experience; Its user-friendly format makes it accessible for both beginners and experienced users alike.